garshot
Screenshot Utility
A fast X11 screenshot tool with built-in annotation editor, interactive region selection, and multiple output formats. garshot uses MIT-SHM for performance (~50ms full-screen captures) and includes 8 annotation tools with a color picker featuring HSV, RGB, and eyedropper modes.

Features
- MIT-SHM for fast captures (~50ms full-screen)
- Built-in annotation editor with 8 tools
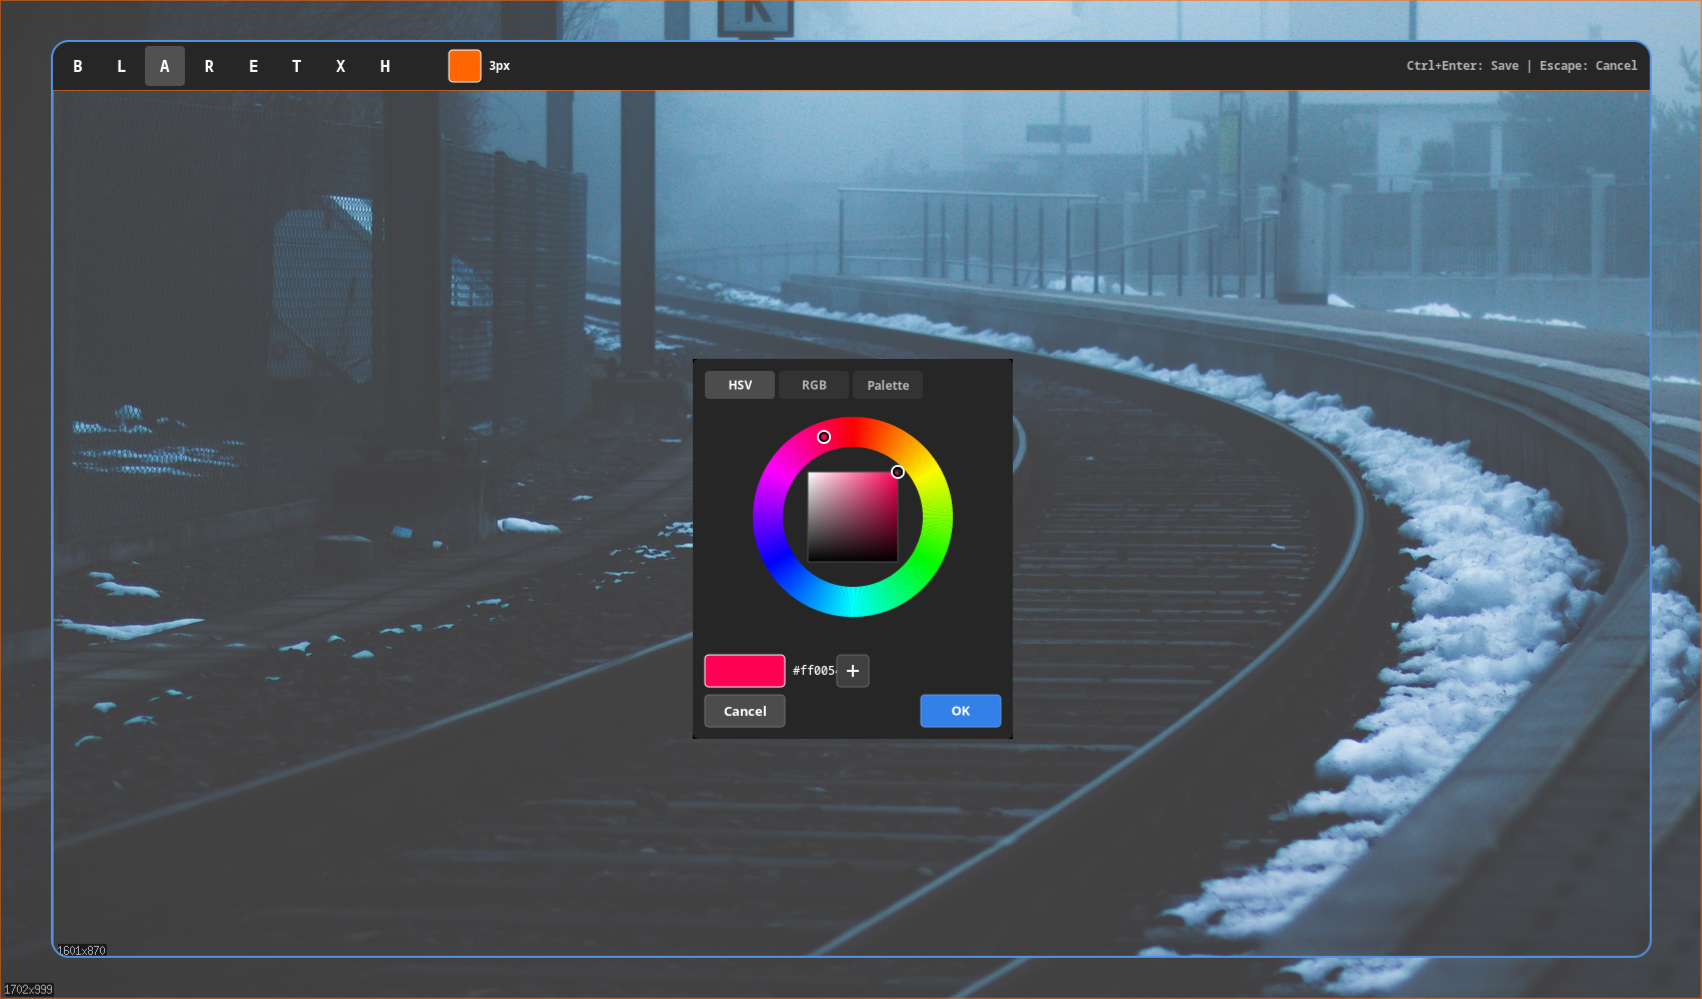
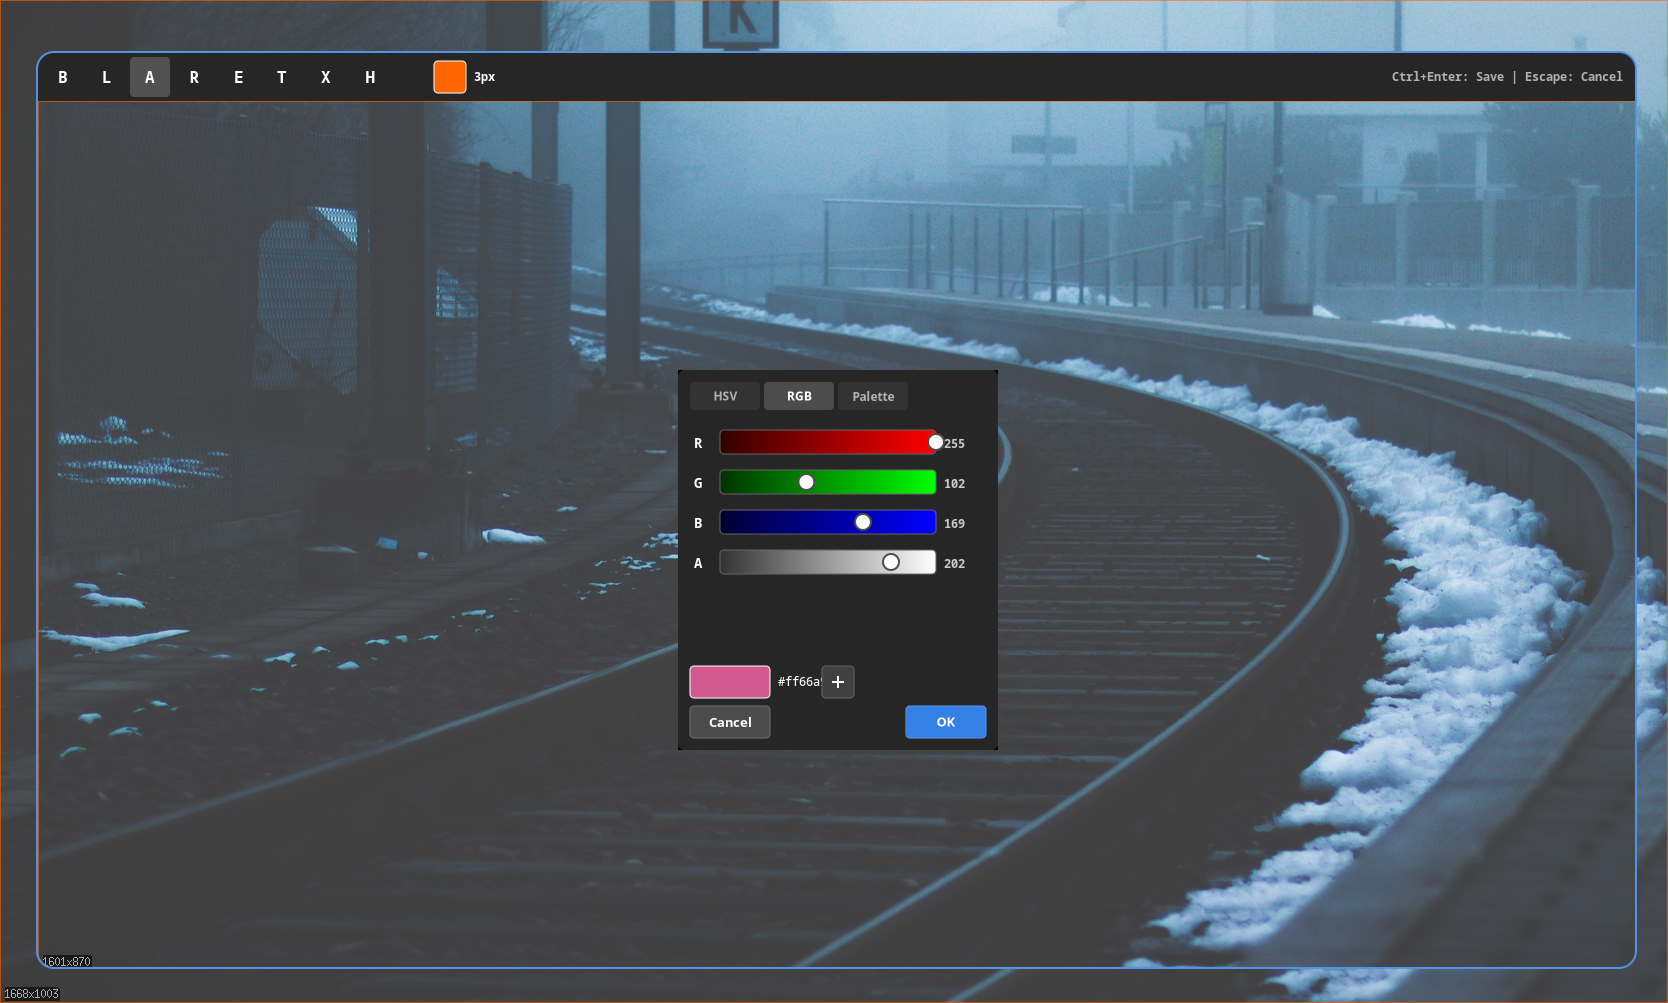
- Color picker with HSV, RGB, palette & eyedropper
- Interactive region selection with blur overlay
- Window capture with optional decorations
- Multiple formats: PNG, JPEG, WebP
- Automatic clipboard copy via xclip/xsel
- Daemon mode for instant subsequent captures
- Capture delay countdown (--delay)
- Desktop notification on save (--notify)
- Undo/redo with full history
- Multi-monitor support via XRandR
Quick Start Guide
Get up and running with garshot in just a few steps. This guide covers installation, basic usage, and essential commands.
1. Installation
Install garshot using the unified installer or build from source:
2. System Dependencies
garshot requires X11 and optionally xclip for clipboard support:
3. Basic Usage
Take your first screenshots with these commands:
4. Output Options
Control where screenshots go:
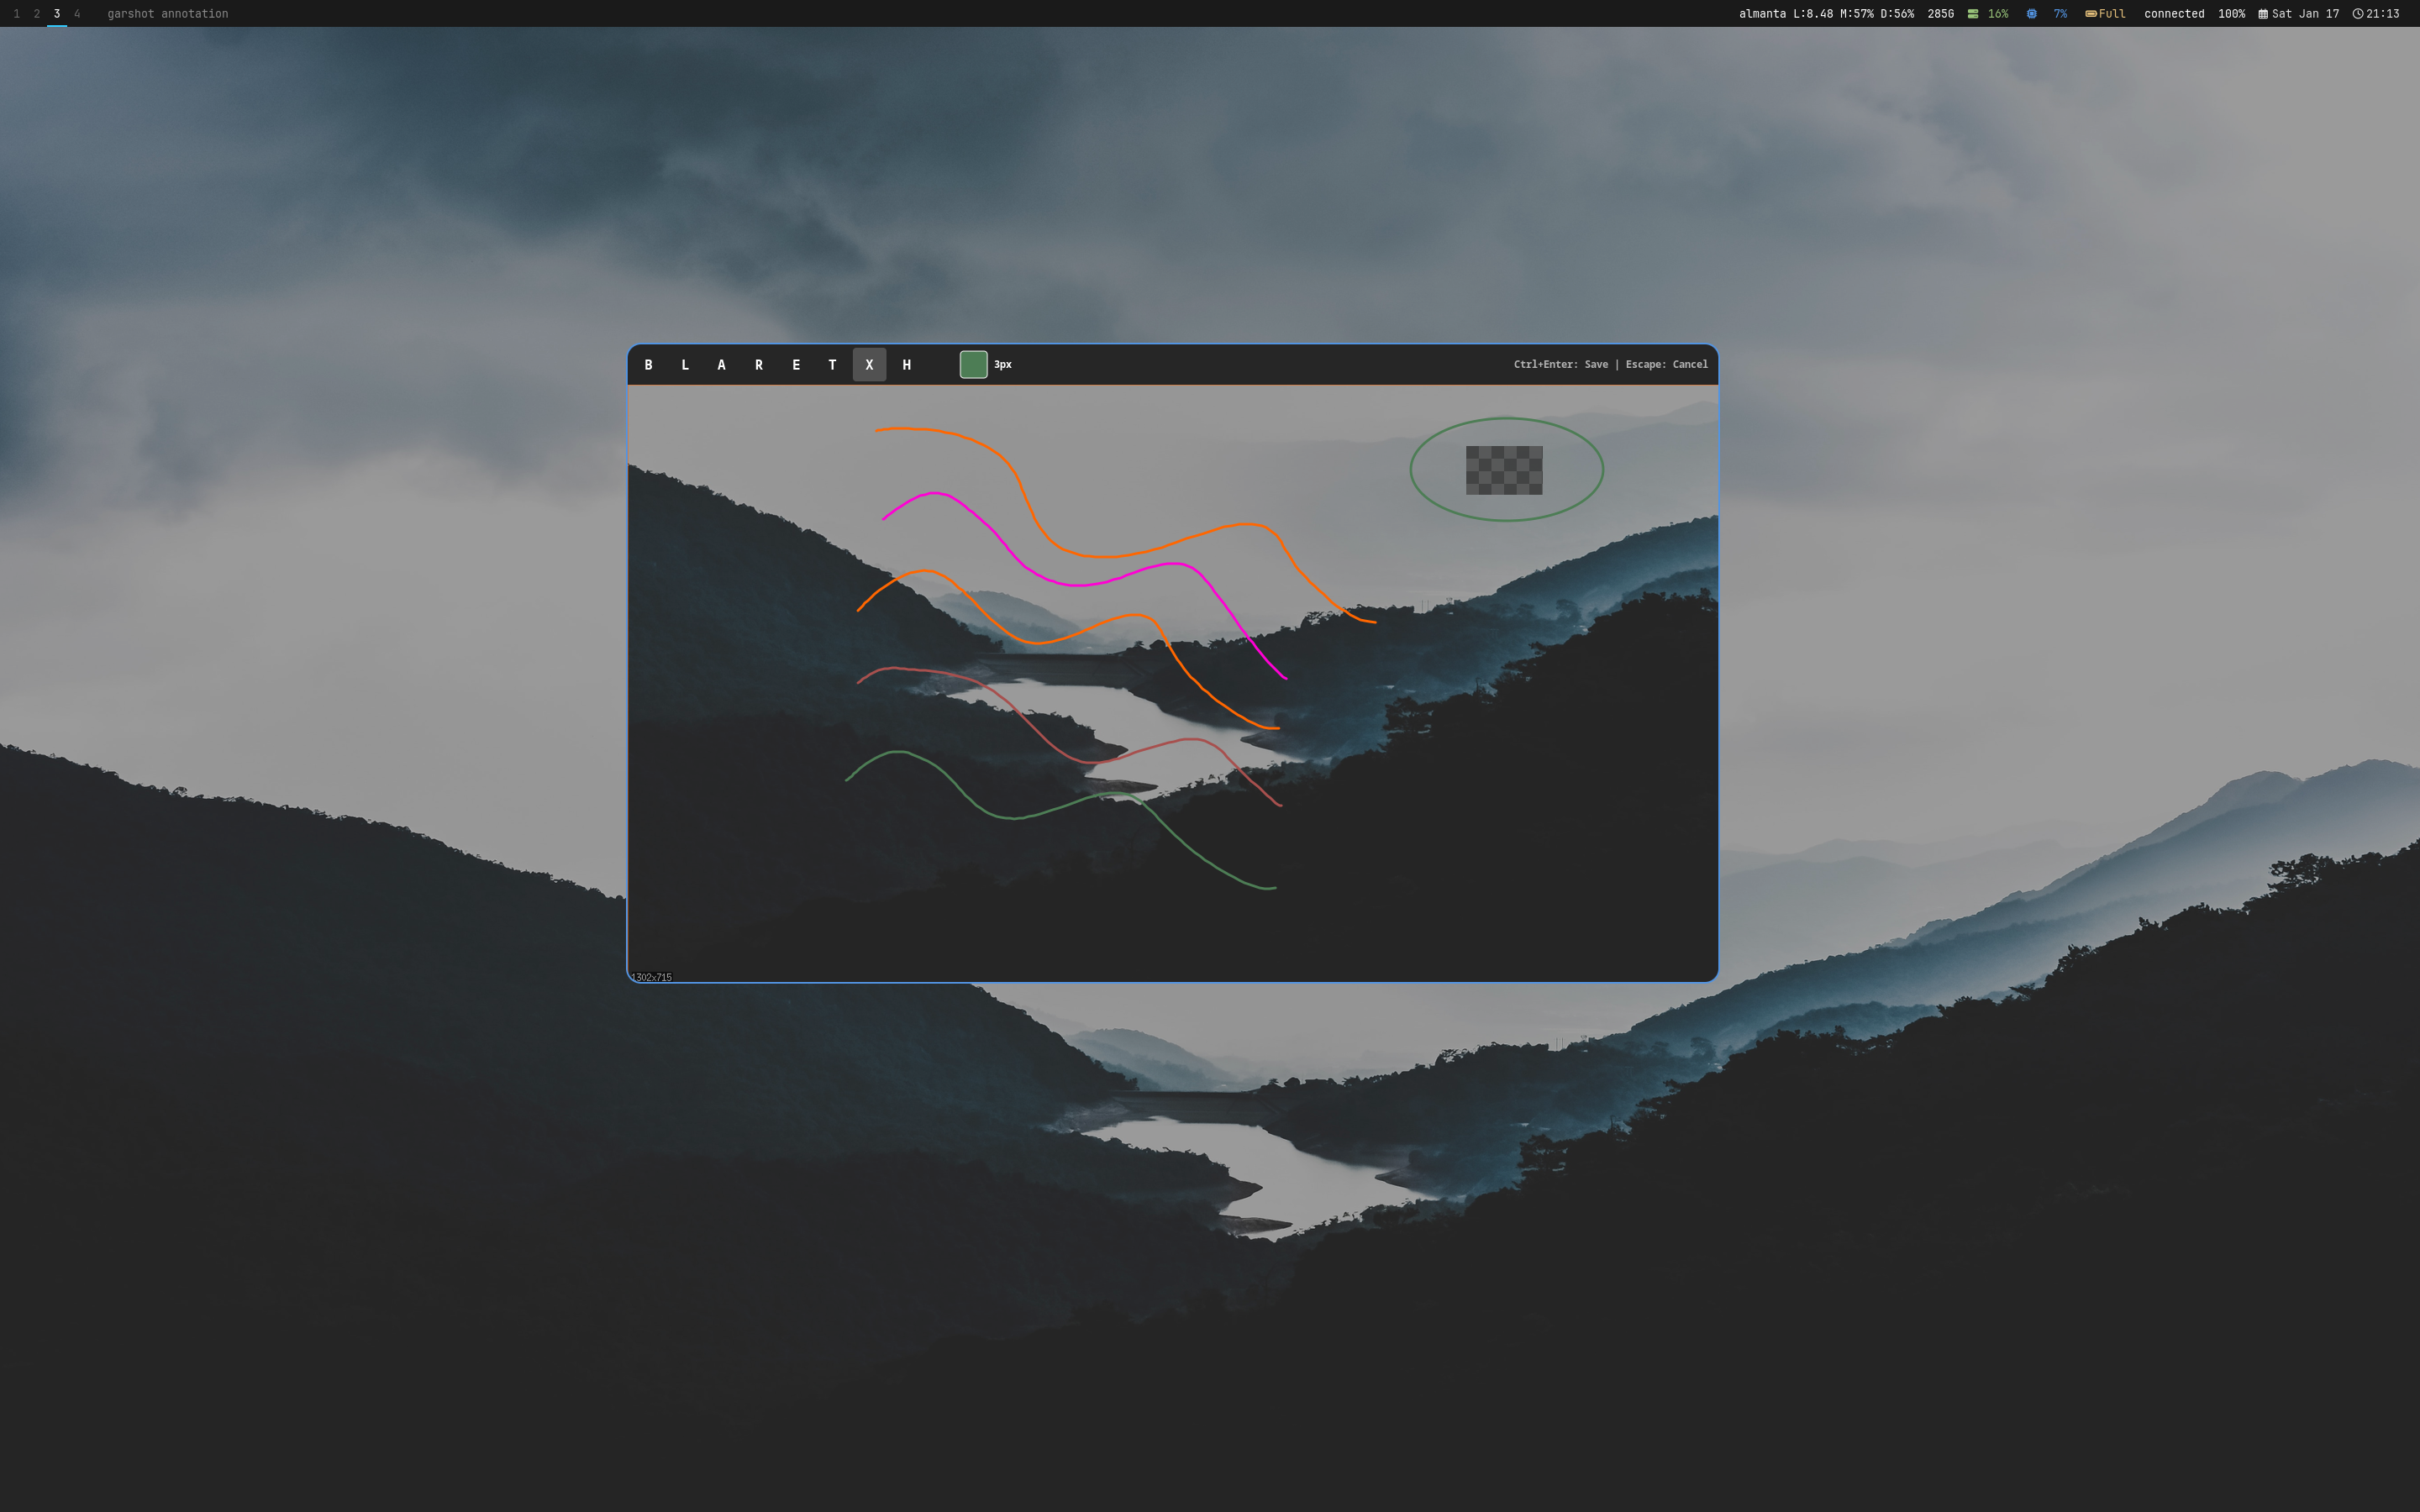
5. Annotation Mode
Edit screenshots with the built-in annotation editor:
In the editor, use Ctrl+Enter to save or Escape to cancel.
6. Daemon Mode
Run garshot as a daemon for faster subsequent captures: